
With a Visio Strategy 1 or Visio Plan 2 license, you can produce mind maps in Visio for the web. This post describes how to develop a mind map in Visio for the web by using either a pre-designed template or samples. You can then edit the mind map
by using your mouse or keyboard shortcuts. If you have Visio in Microsoft 365, you will need to update to either Visio Strategy 1 or Visio Strategy 2 to develop mind maps in Visio for the web. Start your 30-day complimentary trial today to enjoy additional functions and diagram types available in Visio for the web. To see a list of features offered with your Visio Strategy 1 or Visio Plan 2 subscription, go to the “Membership strategies” tab on the Visio comparison page.
Develop mind maps utilizing a template or sample
One of the most convenient methods to create a mind map in Visio for the web is to use a template or a sample:
-
The standard mind-map design template gives you a very little starting point with a predefined design, style, and easy placeholder text, all of which you can modify to your liking.
-
Samples are developed to assist you begin on a specific use case that you can likewise modify additional to fit your requirements.
To create a mind map utilizing a template or a sample, follow these actions:
-
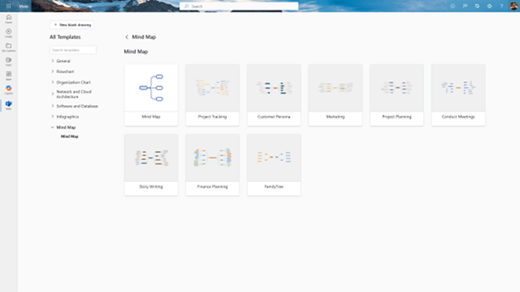
Go to the Visio Templates page and sign in with your work or school account.
-
Under the Templates section, pick the Mind Maps classification.
-
Select Mind Map sample (Project Tracking, Customer Personality, and so on) that you wish to attempt. (When you point at a sample, you’ll see a Preview alternative that provides you a fast visual example.) Select Create to create the mind map.
-
< img src ="https://support.content.office.net/en-us/media/53d8c83a-2626-4f9e-bdb7-36a3b11f3dda.png"alt ="The Visio Templates page revealing the offered sample diagrams under the Mind Map category."/ > A brand-new tab opens with the mind map on the canvas. You can begin editing it by including or erasing nodes, altering the text
, formatting the shapes, and so on. Suggestion: Alternatively, you can create a blank mind map : Under the Mind Maps classification, choose the Produce Blank choice.
Features and tools
You can capture and convey your concepts with the functions and tools described below.
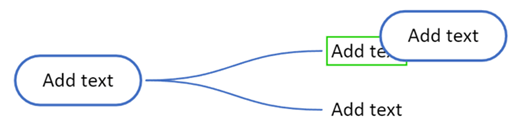
Create new nodes
When you hover over a node, a plus button appears on each side of the node. Use a plus button to include a kid node to the picked node.
A child node is immediately connected to your picked node with a connector. To include a kid node, choose the plus button on side where you wish to add it.
You can also utilize the keyboard shortcuts Tab and Go into to produce child and brother or sister nodes to the chosen node, respectively. For a complete list of faster ways, see Keyboard faster ways below.
Right-click alternatives when editing nodes
Right-clicking a node likewise gives you alternatives to Include Child or Add Brother or sister to the picked node.
Utilize a mind-map stencil
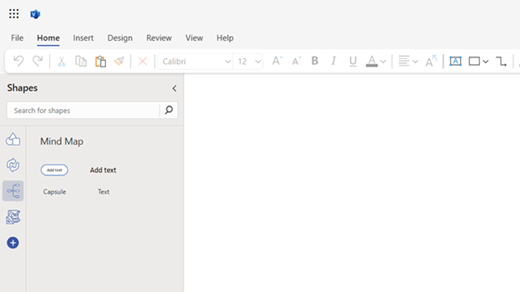
If you are beginning with a blank canvas, you can drag a mind map shape (Pill or Text) from the mind map stencil in the Forming panel onto the canvas. You can find this stencil by either clicking the ‘plus’ button on the Forming pane or by looking for the stencil in the search bar on the Forming pane.
To then broaden the mind map, you can include kid and sibling nodes as explained in the previous area. You can likewise link two nodes by snapping them together, as explained in the next area.
Snapping nodes together If you pick and drag a node to hover over an existing node on the canvas, you will see a highlight around the node on the canvas. When you launch the selected node, the 2 nodes end up being connected to each other. The snapped node becomes a child node of the existing node and is connected to it by a port.
You can snap the node to any existing node on the canvas by aligning them over each other. You can also snap together two nodes that are currently on the canvas. Just drag one node over another node and release it when you see the highlight around the underlying node. The dragged node’s connection will be moved from its earlier moms and dad to the
brand-new moms and dad. If you snap a node to another, all the kid nodes of the picked node will likewise be re-parented to the underlying node, to the last level. The connection between the chosen node and its child nodes will not be affected.
Cut, copy, and paste operations The whole sub-tree, a selected node and its kid nodes, is affected by cut, copy, and paste actions on the root node of a sub-tree. When you cut or copy the root node of a sub-tree and paste it on canvas, the whole sub-tree appears on the canvas as a
separate mind map. Reordering nodes
To change the order in which the sibling nodes appear, drag a brother or sister node with your mouse and drop it in a various position. The nodes automatically get used to keep the overall layout of the mind map. You can likewise reorder nodes by using the Alt+Arrow keys keyboard shortcut. For a full list of shortcuts, see the following section, “Keyboard shortcuts.”
Keyboard shortcuts
We have actually enabled developing and editing mind maps rapidly in Visio for the web with the use of keyboard faster ways. Keyboard shortcuts are mixes of keys that you can press to carry out particular actions without utilizing the mouse. Keyboard faster ways can help you conserve time and get work done effectively.
Following are the keyboard shortcuts that you can use while producing and editing a mind map. (A complete list of Visio keyboard shortcuts is readily available anytime by choosing the Help tab in Visio and look for keyboard faster ways.)
|
Faster way |
Description |
|---|---|
|
Tab |
Develop a kid node in the mind map. |
|
Shift+Tab |
Develop a kid node to the left of root node in the mind map. |
|
Go into |
Create a sibling node (not for root node) in the mind map. |
|
Shift+Go into |
Include a brand-new line while editing text in a shape. |
|
Arrow secrets |
Navigate mind map nodes and to other shapes. |
|
Erase |
Delete a mind map node and all connected child nodes. |
|
Shift+Delete |
Delete only chosen mind map node. Child nodes reconnect to the grandparent node. |
|
Alt+Arrow keys |
Reorganize mind map nodes. |
Note: When you’re dealing with mind maps, keyboard faster ways for regular shapes are overridden by the ones active for mind maps. For instance, while you’re dealing with a mind map, the Tab essential l does not move the selection to the next shape. Instead, you can instead utilize Arrow secrets to do that.


